

Oat Bread Recipe Gluten Free
This gluten free oat bread is what happens when you find oats on sale and you just can't pass them up.
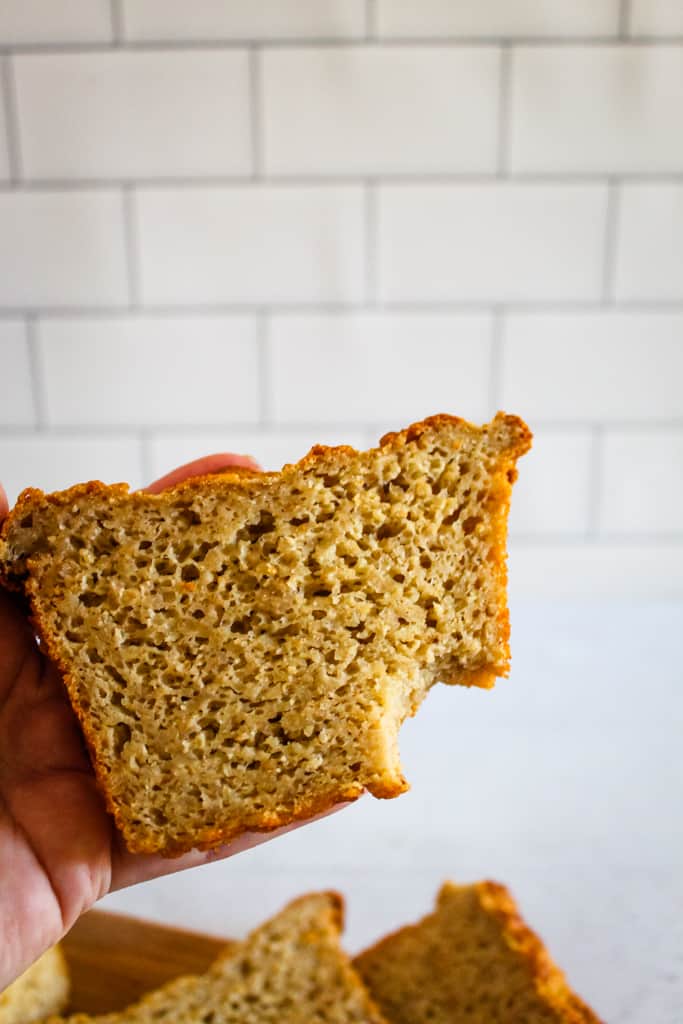
One container can turn into a mountain of lovely oat flour or some amazing oat bread like this recipe today. Oat flour is quickly becoming one of my favorite flours to bake with and I'll share some reasons why in a bit, but first, just look at that slice…

This post contains affiliate links. Affiliate links support Zest For Baking at no additional cost to you. I receive a commission if you choose to make a purchase through these links.
Why Oats and Oat Flour
Back in 2013, when I was first learning about gluten free baking, brown and white rice flours were my standard go-to flours. Not that there weren't others and not that I didn't use others, but these flours just made their way into just about every recipe and particularly my flour blend.
There are several reasons why, but rice flours are some of the most readily available and tend to be easy to work with. Rice flours typically bake up a nice loaf of bread and are often less expensive than other flours. So there are a lot of reasons why they are on the high end of the popularity chart for gluten free flours.
Fast forward a few years and rice flours have taken a back seat to more nutritious, more substantial flours.
As the name gives it away, this hearty bread is made from one kind of flour – oat flour! (Check out these oat flour waffles too!)
Why this bread recipe is the best!
Oats are high in protein and fiber, making them one of the best flours to bake breads with. Besides the nutrients, here are some other reasons why oats are an excellent choice for baking…
Oats are easy to make into oat flour
All you need is a blender or food processor and viola, you have oat flour. Grind it longer for more fine flour and shorter for a coarser blend. I don't normally grind my own flour, but oat flour, I do.
Toasted oats bring out the flavor
Toasting the oats beforehand is not necessary to make oat flour, but it sure does bring out the deep, robust flavor of the oats. It's a lot like toasting nuts – if you've ever had a toasted walnut, they have that darker and more intense flavor than an untoasted walnut.
Oats produce a nicely balanced bread
I mentioned that oats are high in protein and fiber, but just how high and what does that mean for bread baking? Well, according to our flour guide, oat flour contains about 17% protein and 10% fiber. Compare that to brown rice flour that has 7.5% protein and 5% fiber and almond flour with 21% protein and 10.7% fiber.
Both of these are key factors in how much water the flour will absorb during mixing. The oat flour with a higher protein and fiber count will absorb more water than the rice flour, but the almond flour will absorb more than the oat flour. Oat flour is an excellent choice for yeast breads as it it a nice balance.
Pro baking tips for this recipe
This loaf has been tested and retested and retested again - it's an absolutely delicious bread, but for the best bread, it's important to follow these pro baking tips:
Use room temperature ingredients
Room temperature ingredients, as opposed to straight from the refrigerator, are a crucial factor in the success of this bread. It's tempting to just pull that milk straight from the refrigerator and add it to the recipe, but cold ingredients do not mix well and do not make for a nicely risen bread. The same goes for the flours and starches.
Tips for quickly warming eggs: Take a glass measuring cup like this one and fill it ⅔ full of water. Heat the water in the microwave for about 45 seconds. Remove the cup and float the eggs in the warm water for 2-3 minutes. (Watch your water temperature as hotter water will mean the eggs warm faster, less warm water may take a little longer).
Measure the flours and starches by weight
As you probably know, gluten free baking is so much different than baking with regular flours. From the use of starches in baking to the multiple flours, everything is different. And so is the way we measure ingredients. Now more than ever, a digital kitchen scale, like this one, is more important in your baking than ever before. You'll want to weigh everything in grams and then keep it exact. I talk about this more in my baking masterclass, but these measurements need to be exact. And cups may be vastly different from cup measure to cup measure.
Tools for successful bread
Some of these you may have on hand, but these are the tools you'll need to make this recipe:
Stand mixer - even though I bake every day, I am pretty light when it comes to baking tools - so when I say this is a tool you need, it really is one you need! It's a big purchase for sure, but one that will serve you well for years (and I mean years!) to come. For reference, my Kitchen Aid is 22 years old and works like new.
Digital scale - there are some pricier scales out there, but this model is the one I have and works just as well as those. You basically want to it to be able to show grams and switch back and forth from ounces, grams, even ml is nice. It runs about $10-$15.
Food processor - I never thought I used this as much as I do, but I realized this handy appliance's importance when my old one when out! I like this one because it's reliable and doesn't break the bank.
Cookie sheet - something with a non stick coating is as versatile for cookies as it is for toasting these oats.
Instant read thermometer - how any times has it looked like a loaf of bread is done, only to cut into it and see these gummy slices. Now it's not always a baking issue, but many times, that gumminess is just because the bread isn't fully baked. An instant read thermometer will help remedy that problem. I would recommend something like this one. There are always more expensive ones out there, but this one works great.
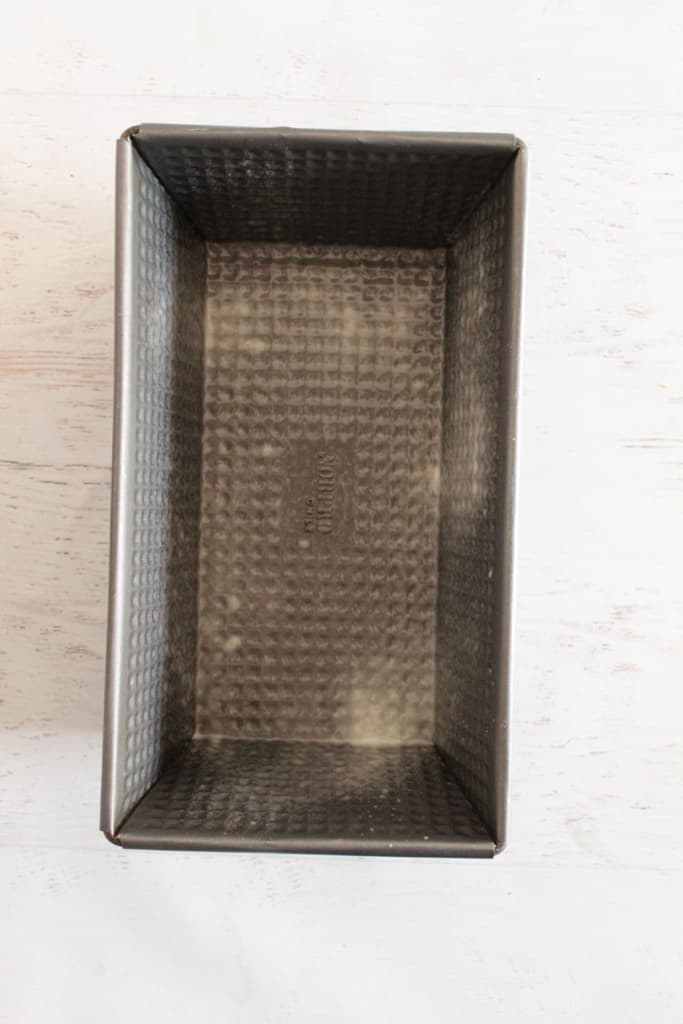
Baking pan - the baking pan you want to use for this bread is one that has dimpled edges so the batter can 'climb' up the walls. These pans are excellent for that reason.
Rubber spatula - This batter is quite stiff for the first few steps, that's why you'll need a good quality rubber spatula for working with it. These are excellent and seem to last forever!
How to make oat bread
Ingredients & substitutions
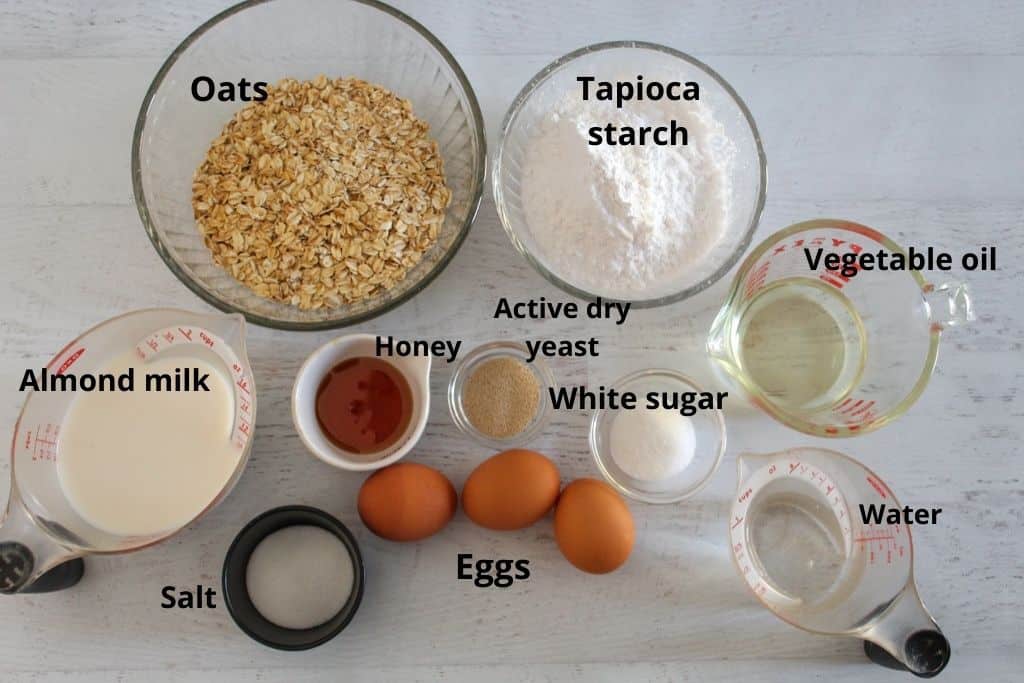
Fortunately, the ingredients list for this bread isn't too complicated. You'll want to make sure all ingredients are weighed and at room temperature though. For where to purchase these ingredients - I recommend somewhere like Gluten Free Mall or Thrive Market - I'm just discovering Thrive Market so I'm really excited about what they offer and the cost savings!
Below are the ingredient brands I used and recommend and the substitutions.
- Gluten free oats - PureOats rolled oats are from a dedicated GF facility! If you need to substitute the oats, I'd suggest going with a different bread recipe... this sorghum bread is delicious. Oats are a main ingredient in this bread so substituting them changes the whole recipe.
- Tapioca starch (also called tapioca flour) - Use the one from Nuts.com - they are not only budget friendly, but also really high quality. My link will get you free shipping with a $29 order too! Instead of tapioca starch, you could use cornstarch or arrowroot starch as well.
- Almond milk - like I mentioned, I'm really liking Thrive Market - here's a great almond milk at a great price (make sure you pick unsweetened!). If you don't want to use almond milk, go for oat milk or coconut milk.
- Oil - I used vegetable oil, but peanut or canola or even melted coconut oil would work well too.
- Yeast - use the active dry yeast. The recipe has not been tested with instant or quick rise yeast!
- Sugar - regular white, granulated sugar was used in the recipe. A substitution for it would be Swerve sweetener. I use Swerve in this sandwich bread and in these lemon poppy muffins and it works the best of all the artificial sweeteners I've tried. Swerve isn't cheap but with something like Thrive Market, the cost is MUCH lower.
- Honey - there's only a Tablespoon but honey adds such a wonderful flavor to this bread. I used this raw honey. Instead of honey, maple syrup would be an equally great substitute.
- Eggs - So there are 3 eggs in this recipe. I used organic eggs from my local grocery store. But if you need to substitute the eggs, my guide to substitutes covers this extensively. Since there's 3, I would not recommend chia eggs for all of them but use something like VeganEgg for them.
Make the oat flour
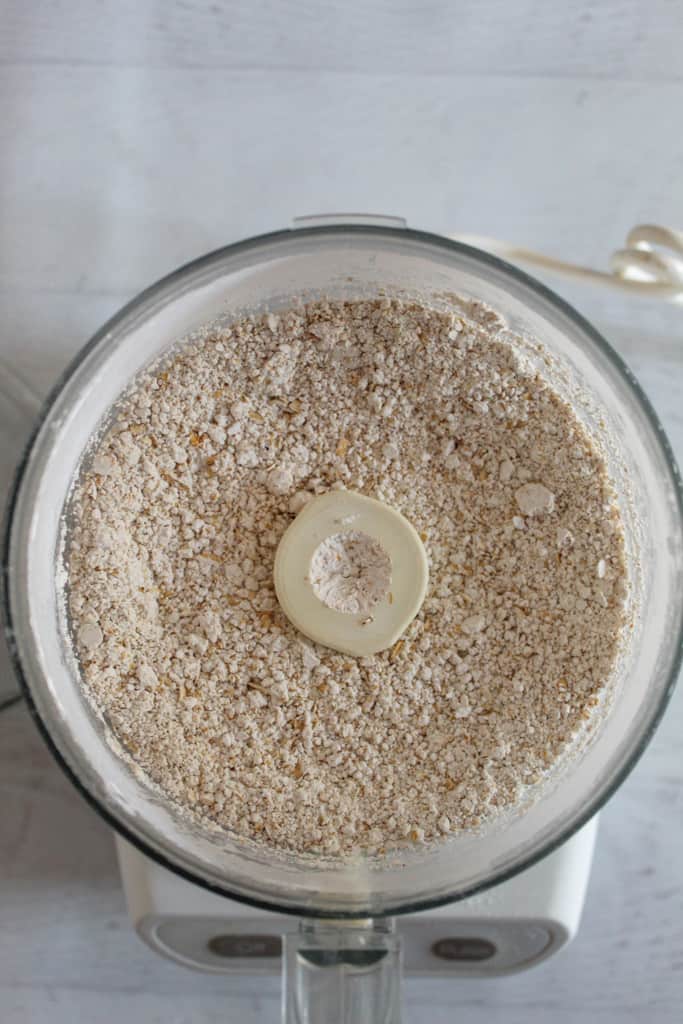
After toasting the oats, add the oats, tapioca flour and salt to the food processor. Mix for about 4 minutes to make the finely ground flour.
Mixing
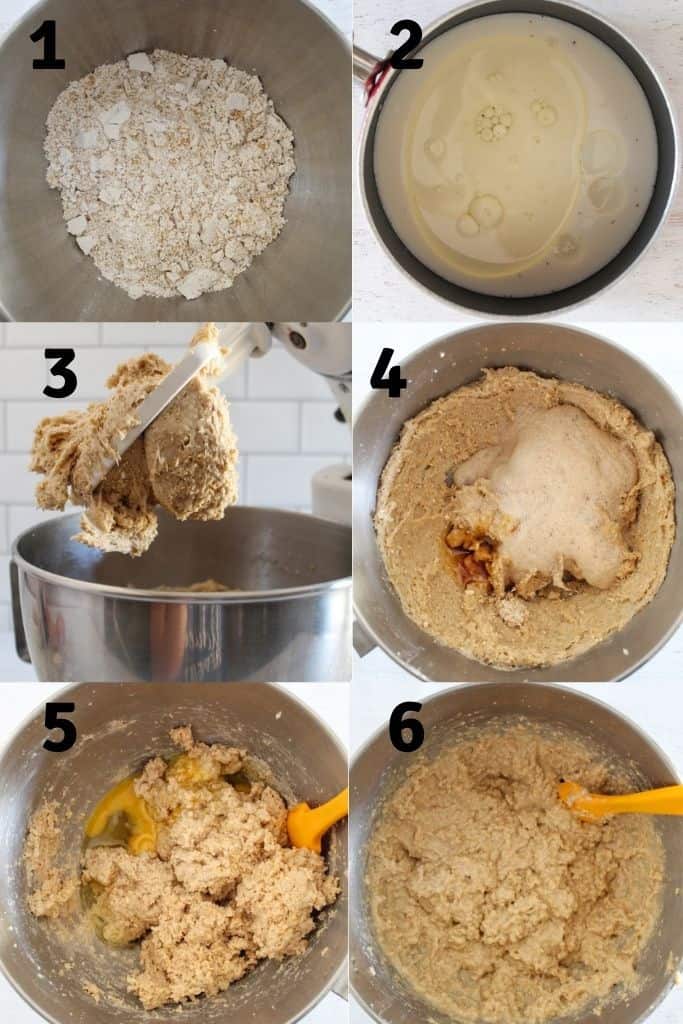
After the oats are toasted and blended in the food processor, add them to the bowl of a stand mixer (step 1 in the image above). Then use a small pot and heat the milk and oil (step 2) just to a rolling boil.
Immediately remove from the heat and pour it into the bowl with the flour ingredients. Mix on medium speed until fully combined. The batter will be very firm and not soft (as shown in step 3).
Add the proofed yeast mixture and the honey to the stiff batter (step 4) and mix for about 30 seconds on medium. Then add the eggs (step 5) and mix again for 1 minute until batter looks like step 6.
Rising

Scrape the batter into the prepared baking pan (10 inch size) and let it rise just until the top of the batter touches the rim of the pan. This may take anywhere from 15 to 30 minutes.
Baking
Bake the loaf for about 50 minutes or until an instant read thermometer reads between 205 - 210 F. Start checking it at 45 minutes.
FAQ's
How do I serve this bread?
The bread is excellent with just about anything from breakfast with some honey and butter to lunch sandwiches. My personal favorite is a mid afternoon snack with a dab of honey!
Can I substitute the oats with another flour?
Unfortunately no. If you don't want to use oats, have a look at this buckwheat bread or this white bread. Both equally delicious loaves of bread.
What's the best way to store this bread?
The best way to store this bread is to wrap it well or place it into a plastic bag and either freeze it or keep it at room temperature for up to 2 days.
What if I don't have a stand mixer?
An alternative would be to use a hand mixer like this one.
My batter is like a ball of dough and tough to mix, is this correct?
This is correct! After mixing together the milk mixture and oat flour mixture, the batter will not be like batter, it will be very stiff. Not until after you mix in the eggs will it look like softer batter.
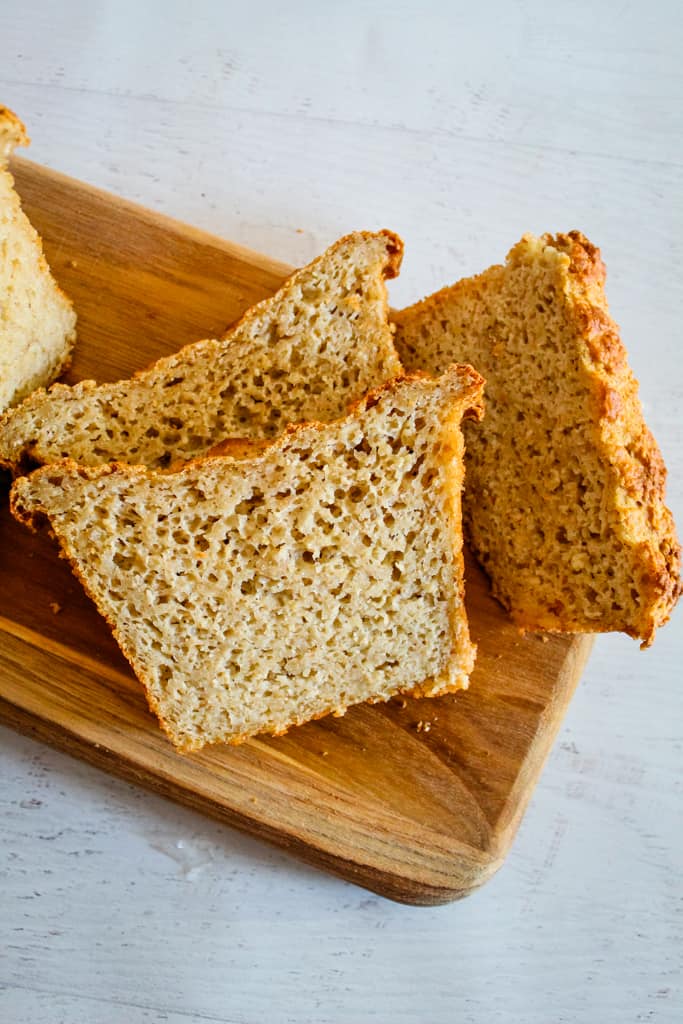
And now for the some of the best oat bread you've ever tasted…

- 193 grams gluten free oats about 2 cups plus 2 Tablespoons
- 175 grams tapioca starch about 1 ⅓ cup
- 1 ½ teaspoon salt
- 1 ¼ cups almond milk
- ¼ cup vegetable oil
- 1 Tablespoon active dry yeast
- 1 Tablespoon white sugar
- ⅓ cup water warmed
- 1 Tablespoon honey
- 3 large eggs
Prepare the oats
-
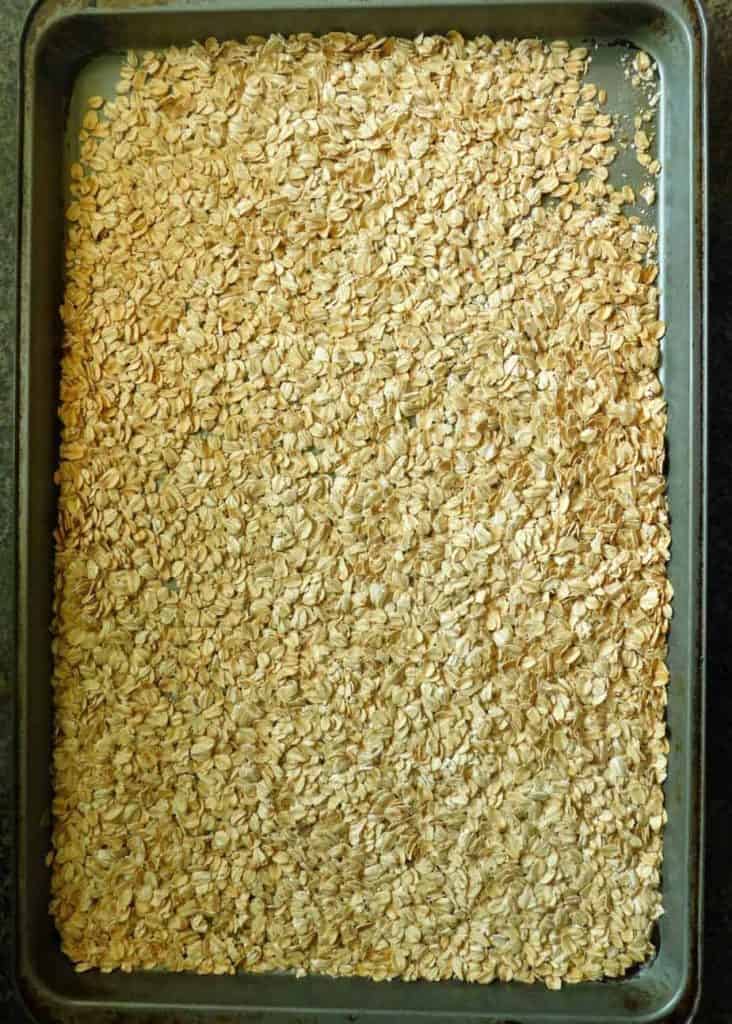
Preheat oven to 350 F. Spread oats on an ungreased cookie sheet.
-
Bake for 12 minutes or until light golden brown. Set aside to cool.
Prepare the batter
-
In a food processor, combine the toasted oats, tapioca starch and salt. Pulse for about 4 minutes until mixture results in flour.
-
Transfer flour mixture into the bowl of a stand mixer.
-
In a small saucepan, add the milk and vegetable oil. While stirring constantly, heat to a rolling boil.
-
Immediately pour mixture into the bowl with the flour and mix on medium speed until fully combined, about 30 seconds - 1 minute.
-
Let mixture sit for 20 minutes to cool.
-
Meanwhile, in a small bowl or measuring cup, combine the yeast, sugar and water. Stir to combine and let sit for 5 minutes to proof.
-
Into the cooled batter in the stand mixer bowl, add the honey and yeast mixture and mix just until combined, about 30 seconds. Scrape the bowl down.
-
Add the eggs and mix on low-medium speed for 1 minute.
-
Prepare a 10 x 4 inch baking pan by spraying with cooking spray and dusting with gluten free flour.
-
Using a rubber spatula, scrape batter down and scoop into prepared pan.
-
Let rise for 15-30 minutes, until batter hits the top of the rim.
-
Preheat oven to 350 F and bake for 50 - 55 minutes.
-
Remove from the oven and let the bread cool in the pan on a wire rack for 15 minutes.
-
Remove the bread from the pan and lay it on its side on the wire rack for 15 minutes to finish cooling. Flip to the other side to cool for another 15 minutes. Turn the bread upright for another 30 minutes of cooling time.
-
Slice and enjoy!
- Make sure ingredients are room temperature.
- Note: tapioca starch is also called tapioca flour - they are the same thing.
- Use a food processor to grind oats into a flour - it will take about 4 minutes to completely grind.
- After adding the boiling milk and oil to the flour and mixing, the batter will be very stiff.
- Let the batter rise just to the top of the pan.
- Cool the bread as instructed.
Calories: 172 kcal | Carbohydrates: 25 g | Protein: 5 g | Fat: 7 g | Saturated Fat: 4 g | Cholesterol: 42 mg | Sodium: 267 mg | Potassium: 112 mg | Fiber: 2 g | Sugar: 4 g | Vitamin A: 108 IU | Calcium: 43 mg | Iron: 1 mg
Download 15 Tried and True Gluten Free Bread Recipes!
Sign up and get baking tips, resources and all the best recipes sent straight to your inbox.
Thank you!
Check your email for your recipes!
Oat Bread Recipe Gluten Free
Source: https://zestforbaking.com/hearty-gluten-free-oatmeal-bread
Posted by: cheungscalwat.blogspot.com
0 Response to "Oat Bread Recipe Gluten Free"
Post a Comment