

How To Clean A Rusty Metal Part
How To Remove Rust from Metal
Learn 3 ways how to remove rust from metal and two means to prevent rust from coming back
Introduction
Patio furniture, outdoor tools and lawn machines all eventually get rusty. Learn how to remove rust from metal and how to protect the metal and so that it doesn't come back.
Tools Required
Materials Required
- Chemic rust removers
- Metal paint
- Metal primer
- Rust converter
- Sandpaper
You're surrounded past tools and machines made out of steel. And when the coatings on those products fissure, rust starts to bloom and the battle is on. You can attack rust early and nip it in the bud, or yous tin wait until you lot have a full-blown war on your easily. Either way, you'll need a boxing plan on how to go rid of rust and a complete list of weapons at your disposal to start the process.
We're going to show yous the five ways how to remove rust from metal—3 methods to remove it and two steps to forbid information technology from coming back, forth with the best rust remover.
Project step-by-step (14)
Step 1
Grind, Sand or Scour Off the Rust
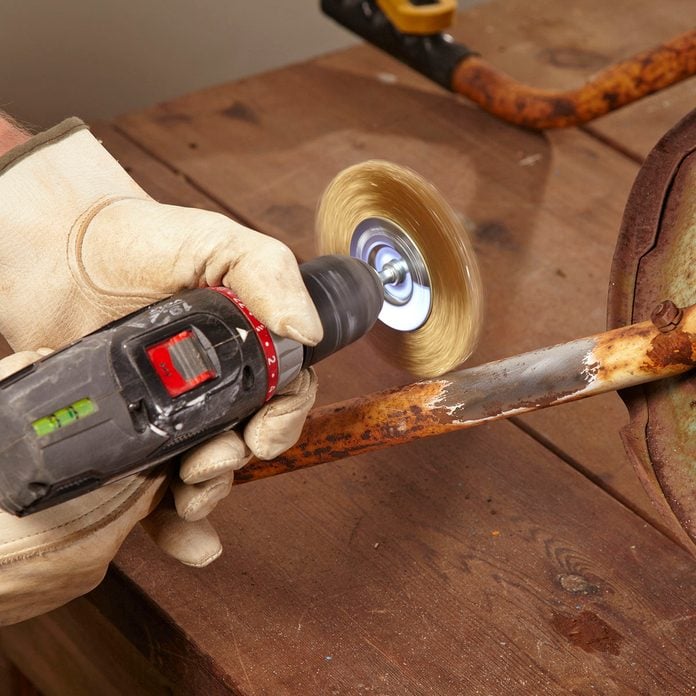
If you don't want to use chemicals and you likewise want to remove the paint along with the rust, use a power tool like a grinder, sander, oscillating tool or drill to remove rust from tools. Whichever tool y'all cull, always start with the coarsest abrasive to for how to remove rust from metallic and pockmarks. Once the rust is gone, switch to a finer grit to smooth out the swirls and grooves caused by the coarse grit. For the smoothest paint job, finish sanding with 400-grit wet/dry out paper.
Step two
Match the Abrasive to the Shape
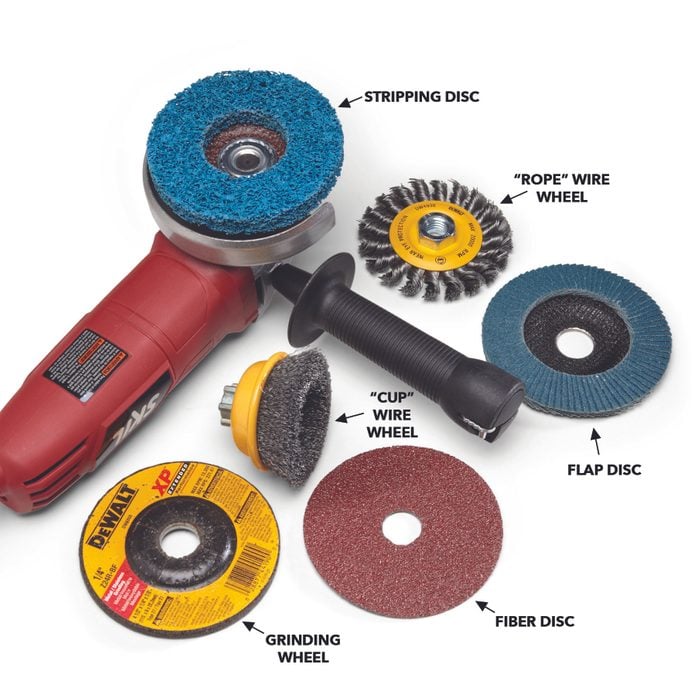
- Utilize flap discs, cobweb discs and sanders on big, flat areas.
- Switch to wire wheels for seams, corners and rounded rusted metallic areas.
- Note: A wide range of stripping, grinding and sanding attachments are bachelor for grinders.
![]()
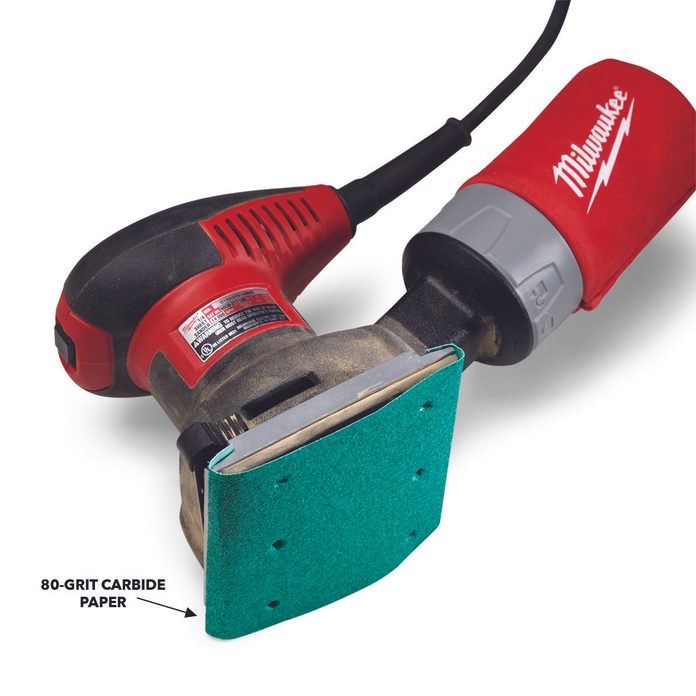
Stride 3
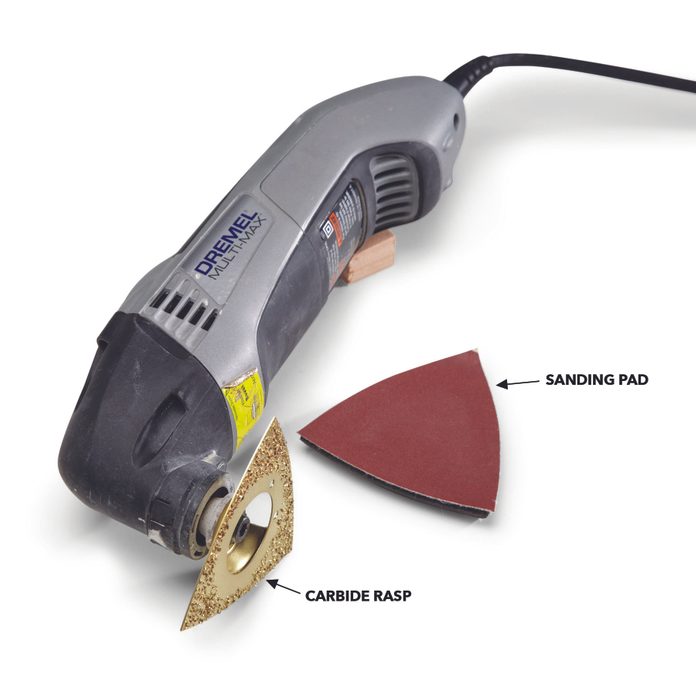
Particular Sander
- Apply a detail sander for rusted metal corners, tight spots and small details.
Step 4
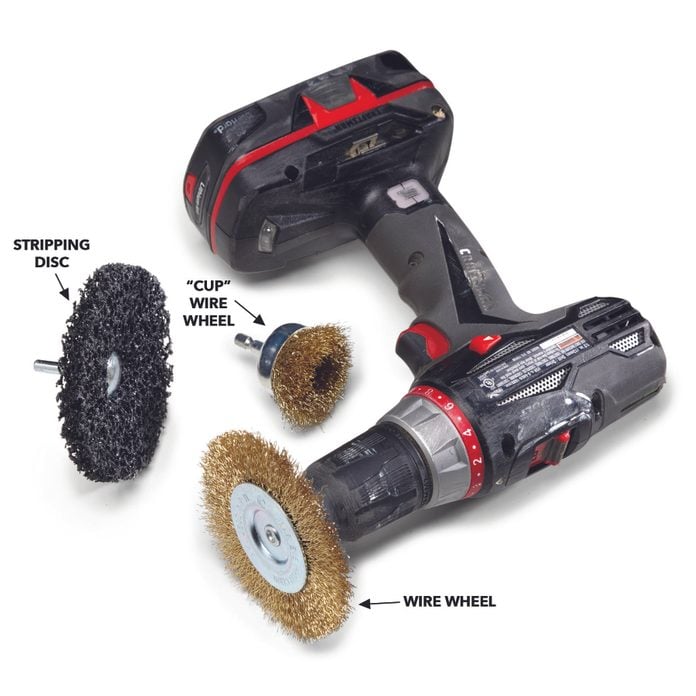
Drill Accessories
- Drill-mounted wire wheels and stripping discs tin be used as a rust remover instead of or in addition to grinders, though they don't accept equally much power or cover as much surface area.
Step 5
Power Sanders
- Finishing and random-orbit sanders are likewise useful tools for rust removal on flatter surfaces.
Pace 6
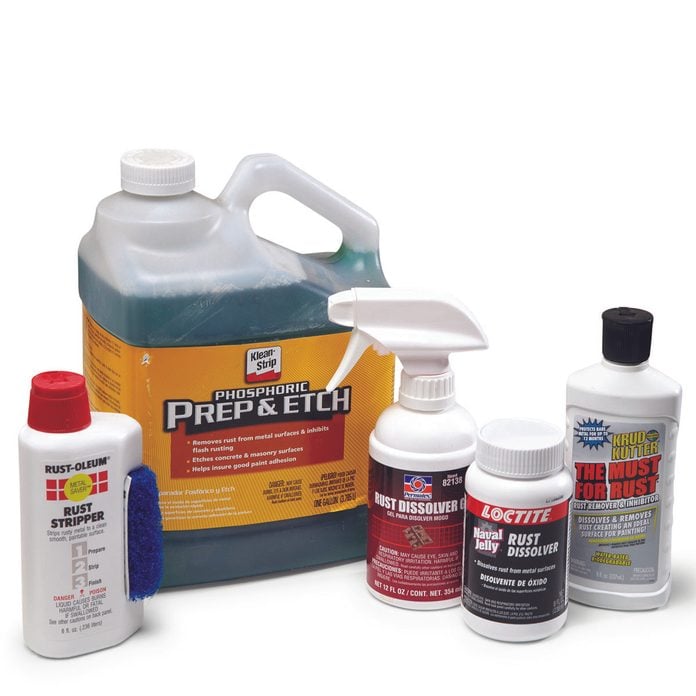
The Chemical Removal Method
The old standby rust remover chemicals incorporate either phosphoric or hydrochloric acid to deliquesce the rust. They're harsh chemicals that give off some pretty intense fumes, so suit upwardly with condom gloves, goggles and a respirator. Find them in the pigment department at any home heart. You'll also need an old paintbrush, a waste tub, a iii-inch putty knife and rags.
- Employ the chemicals with the paintbrush and await the recommended time for the chemicals to work.
- Scrape off the liquefied rust.
- Notation: Yous won't get it all in a single step—count on multiple applications to completely remove heavy rust buildup. Consider a gel formula when removing rust on vertical surfaces. It'll cling better and result in less runoff.
Step 7
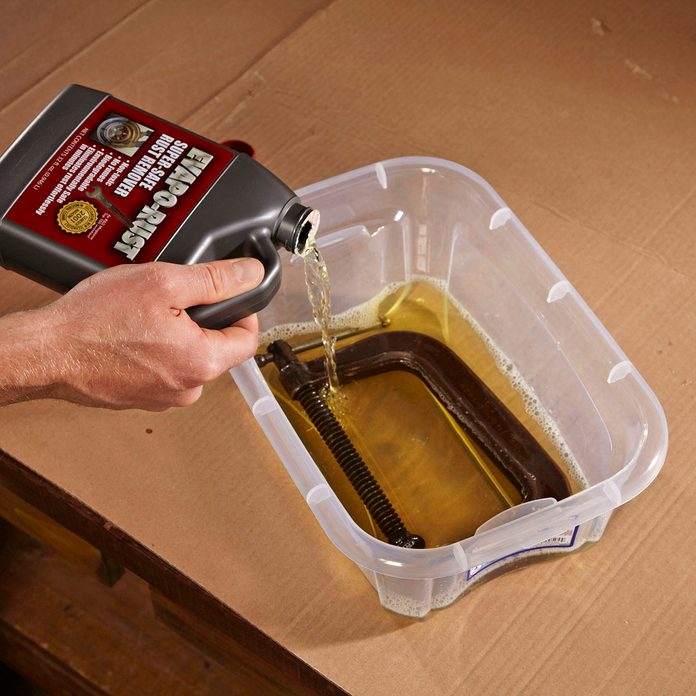
Or Effort Safer and Gentler Chemicals
-
- Note: Endeavor one of the newer non-toxic and acid-free soaking solutions. These chemicals dissolve rust more slowly, only if y'all're patient, they piece of work.
- Pour the rust remover solution in a plastic tub.
- Clean off whatever oil or grease on rusted metal before soaking.
- So drop in the rusted detail and walk away.
Pace viii
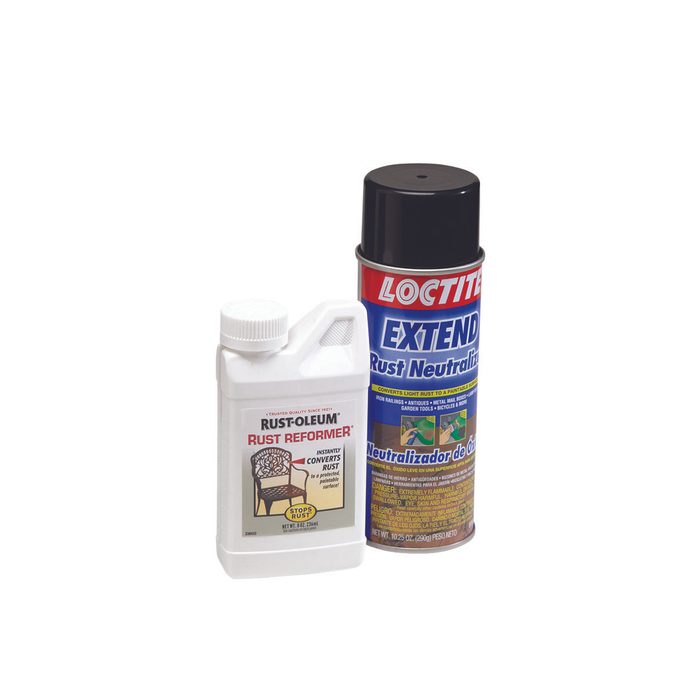
The Easiest Method to Combat Rust? Catechumen Information technology.
If you can alive with the expect of a rough or pockmarked finish, rust converter can salvage you a lot of time. It kills the rust, prevents its spread and dries into a ready-to-paint primer. Purchase it at any home centre or auto parts store.
- First by removing whatsoever flaking paint and rusty dust with a wire brush.
- Either spray on the converter or apply it with a disposable paintbrush.
- Let it dry for the recommended fourth dimension.
- Pro tip: Even though the label says you tin can paint after it dries into a primer glaze, I recommend spraying on a real primer, so painting.
- Apply a second coat of converter if you're not going to pigment.
- Pro tip: Don't render the leftover converter to the bottle—it will contaminate the residual. Toss it in the trash, along with the brush.
Step 9
Choose Between Liquid and Spray Converter
- Rust converter comes in brushable liquid or aerosol spray.
- Rust remover spray provides a smoother finish but doesn't penetrate astringent rust as well as brushable liquid.
Pace 10
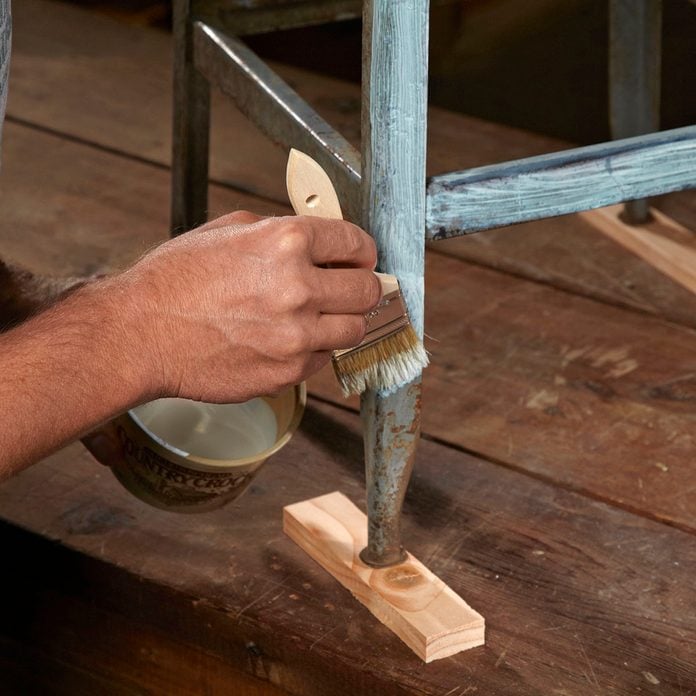
Apply Converter Afterwards Wire Brushing
- Pour a minor amount of converter into a cup and work it into the rusty patches with a paintbrush.
- So smooth out the brushstrokes and permit it dry out.
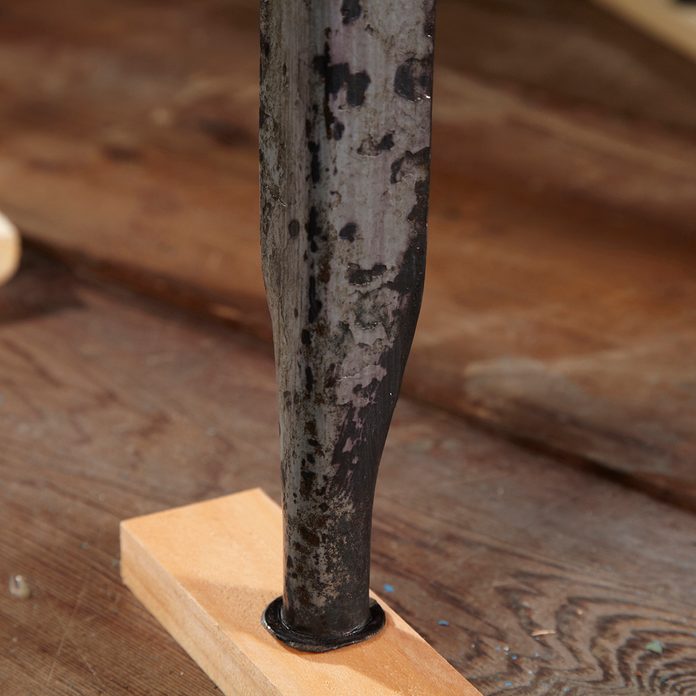
- When dry out, the surface will look rough but rust-complimentary.
Iii Means to Remove Rust from Tools
Grind, sand or scour off the rust
Pros: No pockmarks and a smooth finish prior to painting. Consummate project in a 24-hour interval. No waiting for chemicals to work.
Cons: Dirty, dusty, hard piece of work. Requires ability tools and lots of elbow grease.
Convert the rust
Pros: Easiest way to terminate rust and prime in one operation. Less expensive than chemic or mechanical methods for removing rust.
Cons: Leaves a rough or pockmarked stop that'll show afterward you lot paint. May not inhibit rust as long as traditional removal, priming and painting.
Remove rust with chemicals
Pros: Soaking removers tin do all the work for you if the item is small enough. Spray removers greatly reduce the grunt work, only they require several applications and some scraping.
Cons: Long wait times for the liquid removers to do their job. Makes a huge mess. Soaking removers are expensive and tin can be used only on small items. The surface will still be pockmarked subsequently the rust is gone.
Tip: Don't recollect you can spray rust-inhibiting paint onto a rusty surface and become practiced results. The rust will bleed correct through the paint and ruin your new paint job. You lot have to bargain with the rust with one of the methods we show here. There's just no style around it.
Step 11
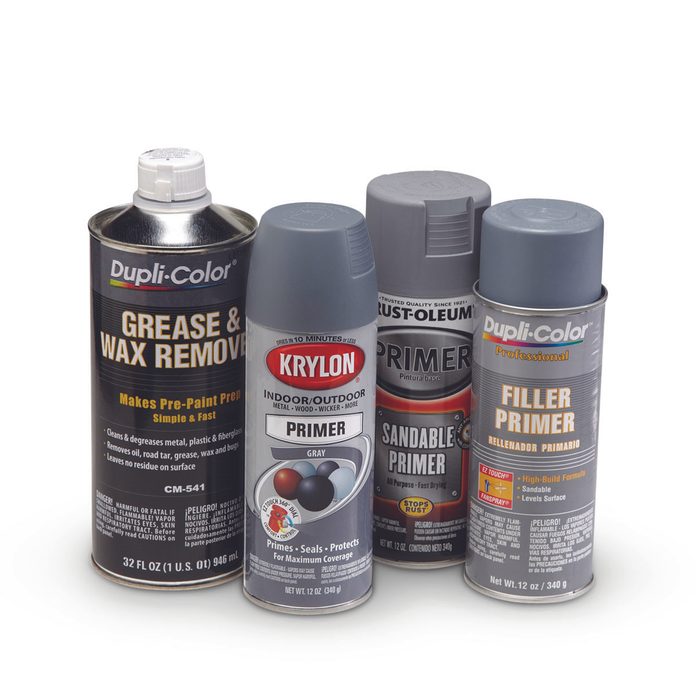
Preclude Rust: Prime First
- Choose a regular (not-sandable) primer if the surface is completely smooth.
- To fill in scratches, choose a sandable primer and lightly sand when dry.
- Use a filler primer to fill in pockmarks.
Step 12
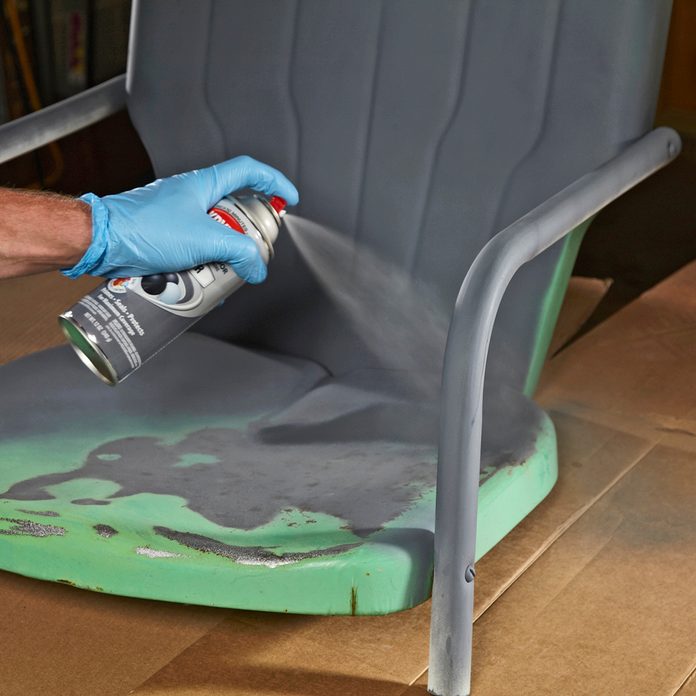
Set and Prime number
- Make clean the metallic earlier priming.
- Apply the primer over the old paint and the newly sanded metal.
Step 13
Prevent Rust with Paint and Topcoat
-
- Notation: Several companies make rust-inhibiting paint. If you don't find the color you like, try the paint department at an auto parts store.
- Spray on a concluding topcoat of clear gloss.

Footstep 14
Utilize a Clear Topcoat
- Allow the color coat to dry completely.
- Spray on a clear topcoat to extend the life of the pigment.

Choice a High-Quality Paint
After all the nasty prep work, why take chances another bout of rust by using cheap paint? Inexpensive paint contains less paint, fewer resin binders and no rust inhibitors. Spend a few extra bucks on a premium rust-inhibiting pigment. It volition incorporate zinc additives that provide an extra measure of protection against future rust.
Brushing usually provides a better paint bail than spraying, but it leaves brushstrokes in the finish. Notwithstanding, spraying is tricky and if you stay in one spot too long, you can wind up with paint sag marks in the terminate.
Whichever painting method yous choose, seal the newly painted detail with a clear topcoat. That'll add to the gloss and dramatically increase the life of the paint by reducing paint oxidation.

Source: https://www.familyhandyman.com/project/how-to-remove-rust/
Posted by: cheungscalwat.blogspot.com
0 Response to "How To Clean A Rusty Metal Part"
Post a Comment